My blog has moved!

You should be automatically redirected in 6 seconds. If not, visit
http://ahungrybear.com
and update your bookmarks.

Thursday, May 29, 2008

cooking my way through jamie's italy

grilled swordfish

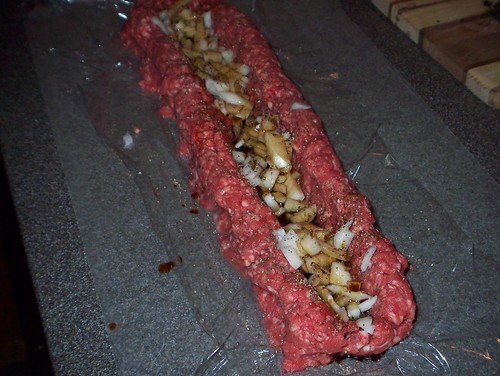
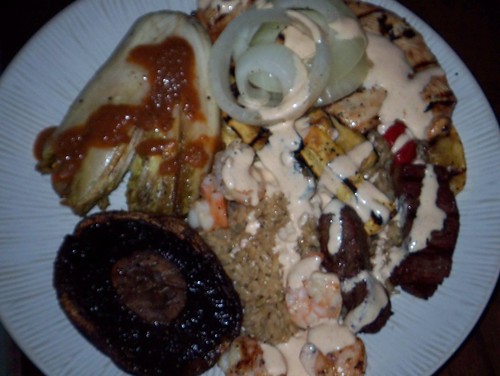
My friend Lydia told me that she has a habit of reading cookbooks cover to cover, even curling up in bed with them like they were novels. I like cookbooks too, but never really understood what she meant until I discovered Jamie Oliver's "Jamie's Italy." I saw a review for it on Orangette, and ordered it immediately. As soon as it arrived, I started flipping through, and before I realized what had happened, it was an hour and half, and 300 pages, later. Normally, I dismiss "celebrity chefs" for the most part - I mean, if you're going to sell out and endorse the Applebee's restaurant chain, you lose a lot of credibility with me. But this guy's cookbook is amazing, and I know nothing about his "celebrity personality" behind the book. He basically traveled all around Italy for a few months in a camper van, collecting different regional recipes - and *amazing* photos of local people and their food. There hasn't been a thing from the book that I've cooked that we haven't raved about. Here are some highlights...

garlic and herb sauce for swordfish

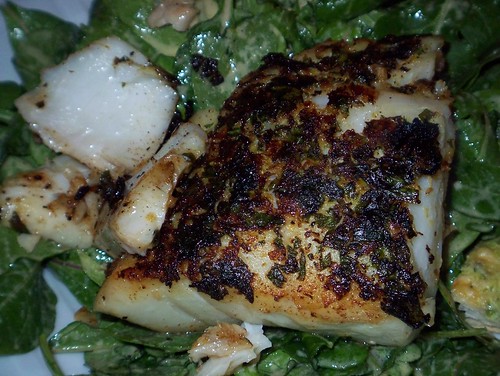
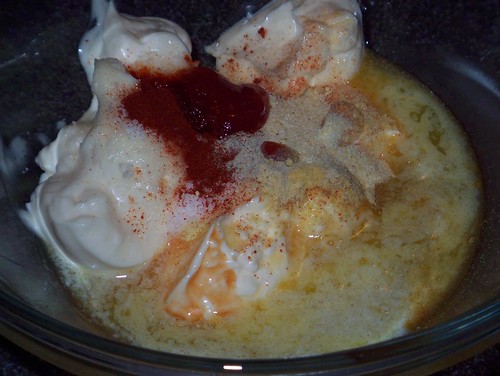
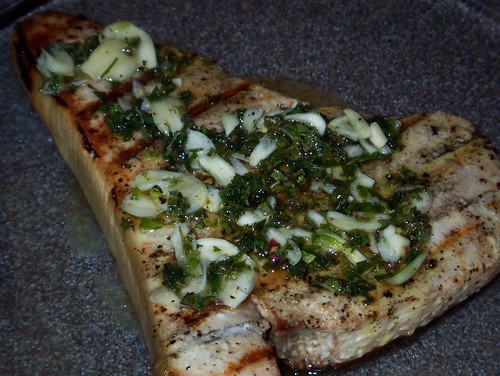
The first photo above is for his "grilled swordfish with salsa di giovanna" (the second picture, immediately above, is the salsa). To make it, you just grill the swordfish steaks (brush with olive oil if you're using the outdoor grill especially) with salt and pepper. The sauce is simply juice of 1 lemon mixed with 3 times as much olive oil, salt, pepper, 3 cloves of garlic sliced very thin, a sprig of chopped mint leaves, and a sprig of chopped fresh oregano.

ricotta stuffed mushrooms

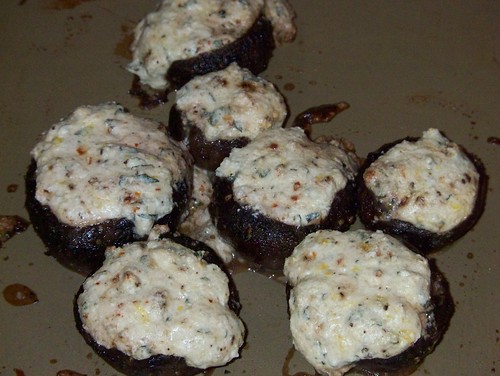
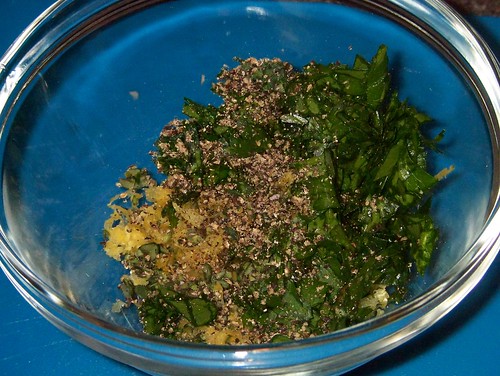
Who doesn't love stuffed mushroom caps? Jamie's recipe calls for 3oz ricotta, zest of 1 lemon, 1 fresh red chili chopped and deseeded (I substituted dried chili flakes), 2 T chopped fresh oregano or marjoram leaves, handful of freshly grated parmesan, 4 handfuls of mushrooms. Start by preheating the oven to 425 degrees, then pull out all the mushroom stems. Toss the caps with olive oil, salt and pepper, then arrange on a baking sheet, upside down.

ricotta filling for stuffed mushrooms

The filling is simple -- mix all the other ingredients together. Spoon into the mushroom caps, and bake for about 15 minutes. You could also turn on the broiler for a minute or 2 at the end, to make the tops more golden.

garlic and chard

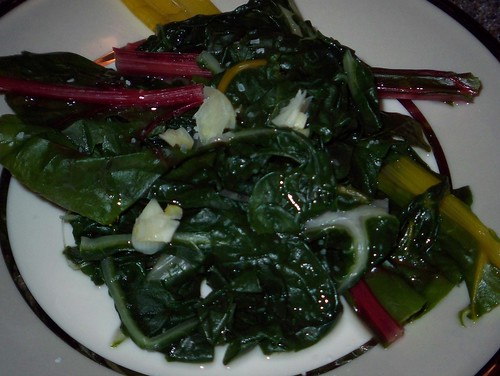
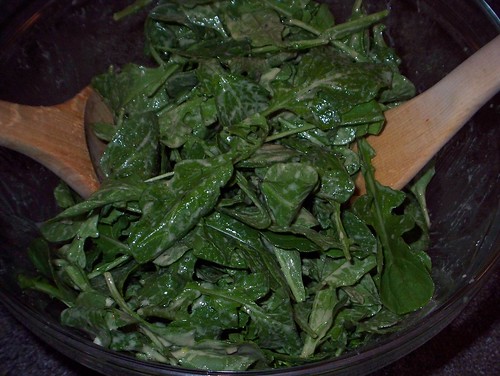
In his section on first courses, I love how he pushes the concept of serving fresh blanched greens, dressed with a little olive oil, lemon, and garlic, as a starter. What a healthy way to add more greens into a meal. He recommends adding the chard stems to the boiling salted water a minute or 2 before the leaves, since they are a little tougher. I also tried his suggestion of adding a garlic clove to the blanching water, then slicing it thinly to top the chard. Drizzle with a little olive oil and sea salt, and you have a nice little salad.

roasted mushrooms and mozzarella

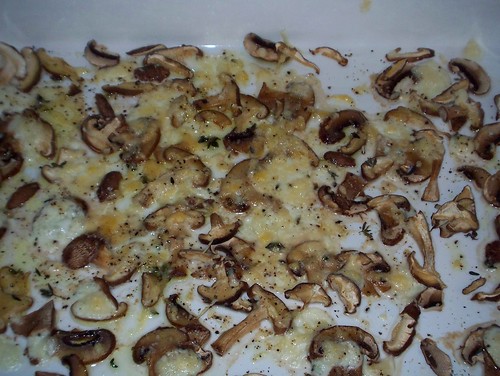
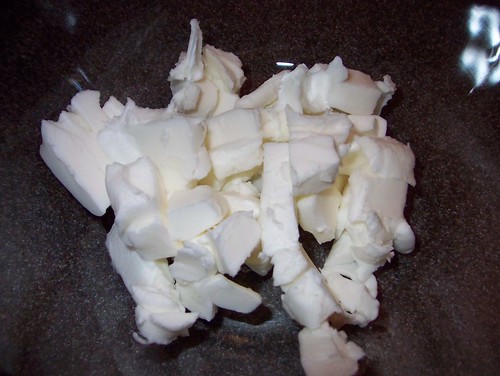
This is the recipe that Orangette blogged about that got me to try the book in the first place - "funghi tagliati a fettine sottili, con mozzarella fusa e timo" (sliced mushrooms with melted mozzarella and thyme). This was truly amazing - I could probably eat an entire baguette myself, just scooping up these mushrooms... It's so simple: arrange thinly sliced mushrooms (crimini, shitake, anything you have) in a single layer of a pan, then drizzle with olive oil. Sprinkle finely chopped thyme leaves across, season with salt and pepper; tear apart a ball of buffala or scamorza cheese and drop little pieces all across the dish. Broil for a few minutes, until the cheese is bubbling and golden. Wow.

bruschetta with mixed vegetables and herbs

Jamie presents several different bruschette topping options; I tried the "mixed roasted vegetables" to start (I'll get to the others I'm sure, not soon enough!). Chop some vegetables (1/2 a bulb of fennel, 1/2 a yellow pepper, 1 red pepper - which I skipped because I wanted to cut the recipe down, 1/2 a zucchini), then toss with olive oil, salt and pepper, 1 tsp dried oregano, and a handful of chopped fresh mint.

herbs and vegetables ready to roast

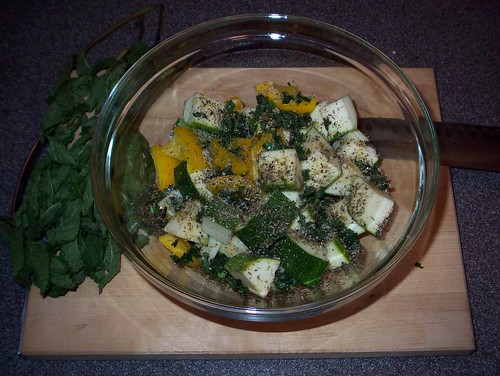
Roast for about 30 minutes at 425 degrees, then allow the vegetables to cool. Pulse in a food processor for a few seconds with a drizzle of olive oil, juice of 1/2 a lemon, and some herb vinegar (I actually used good balsamic, with great results). For the bruschette, you can brush slices of bread with olive oil then grill or broil - top with the vegetable mix.

Monday, May 26, 2008

memorial day cookout: my favorite borrowed recipes

burgers rings and potato salad

I'll take any excuse to grill burgers, and memorial day is no exception. I found several recipes from my favorite new food blogs, and decided to spice up my cookout routine - I'm so glad I did. The blue cheese and bacon potato salad is from the latest issue of Martha (which I accidentally receive at my house, since its former occupant was a subscriber). The burger recipe, which is unique more for the preparation method instead of the ingredients, comes from The Kitchn, an Apartment Therapy blog. And these onion rings, these most crispy-perfect-with-a-kick onion rings, are from Last Night's Dinner, quite possibly the world's prettiest food blog.

Grocery list: (for the burgers) 1/2 vidalia onion, 2 pounds ground beef, worcestershire sauce, soy sauce, garlic powder, salt, pepper, a little leftover bacon grease, bacon, buns, any toppings you like; (for the potato salad) 1.5 pounds small red potatoes, 4 slices cooked bacon, dijon mustard, red wine vinegar, 2 ounces blue cheese crumbles, chives, 1/2 cup buttermilk, olive oil; (for the onion rings) 1 large red onion, sriricha hot sauce (or other hot sauce), vegetable oil, salt, A/P flour.

kitchn burger snake recipe

Here's the original recipe from The Kitchn, which I followed almost exactly (other than substituting ground sirloin for ground chuck). I recommend spreading waxed paper and/or plastic wrap on the counter first, then shape the 2 pounds of beef into a long "snake". Form a deep trench in the middle, scattering the finely chopped onion into the well. Add about 10 dashes of worcestershire and soy sauces, a sprinkle of salt and garlic powder, and a generous amount of cracked pepper. If you have any leftover bacon grease (I don't serve burgers without bacon if I can help it), drizzle 1-2 T of this down the middle as well. Pinch off sections of the snake to form patties, and grill over medium heat till the burgers are as done as you like.

blue cheese dressing

For the blue cheese potato salad, start with the dressing. Mix together 1/2 cup buttermilk with 2 ounces crumbled blue cheese (use a fork to break up the cheese thoroughly), then mix in 1 tsp dijon mustard, 1 T red wine vinegar, and 1-2 T olive oil. Slice the potatoes into halves or quarters (bite size pieces), then boil in salted water for about 12 minutes, until you can pierce easily with a fork. Drain and allow to cool. Toss the potatoes with the dressing, and refrigerate to cool Just before serving, stir in a handful of finely chopped chives to the dressing, and 4 slices of crumbled bacon. Season with salt and pepper.

sriracha and onions

Now comes my favorite part, those onion rings... The photos from the original recipe on Last Night's Dinner are much better, but I'll include mine so you can see how easy it is to replicate her masterpiece. Start by thinly slicing a red onion and separating into rings; place in a large bowl. Season with sea salt, and generously coat with sriricha hot sauce (side note - my little brother and I spent some time in Cambodia last year, and I swear this is the exact hot sauce that was served with every meal I had there). Toss to coat, and allow to sit for 20-30 minutes for the onions to release their juices.

breading onion rings

Next, shake about 1/2 cup of AP flour into a large ziploc bag. Grab a handful of the onion rings, and squeeze out any excess water and hot sauce. Transfer to the bag, zip closed, and shake to coat. Heat about an inch deep vegetable oil in a cast iron skillet, until it shimmers (medium-high heat). Gently add a few onion rings at a time to the pan, and cook until golden and crispy.

onion rings

Use a spider to carefully remove the rings to a paper-towel lined plate; season with a little more sea salt. As LND says on her blog, these are best served hot and fresh - this is so true (I couldn't help but eat approximately 1/3 of the batch before ever getting them to the table).

Friday, May 23, 2008

lemon and herb crusted halibut over arugula salad

herb crusted halibut

Pacific halibut is now available at WF here in Atlanta, and I can't stop thinking about new ways to try it. I found this Emeril recipe and when I saw that it involves painting the fillet with dijon mustard (before pressing with lemon zest and herbs), it reminded me of this delicious vinaigrette concoction featured on Orangette a few weeks ago. I decided to make my own version of the lemon-herb mixture, sear the fillet, then serve over a simple arugula salad - summery, light, but tangy enough to it complements this delicate whitefish. A perfect weeknight meal for hot Atlanta weather (at least while halibut is available).

Grocery list: 1 pound halibut fillet, cream, dijon mustard (roland extra strong is what Orangette recommends - it's my favorite as well), white or red wine vinegar, 1 garlic clove, zest of 1 lemon, thyme, parsley, heavy cream, olive oil.

creamy dijon dressing 2

To make the vinaigrette, mix 4 T olive oil, 3 T heavy cream, 2 T wine vinegar, 1 mashed garlic clove, 1 tsp dijon (note - I started with just the oil, garlic and dijon base, adding more like 1 T of dijon, in order to use part of it to coat the halibut, which I'll get to below). Whisk and season with salt and pepper.

thyme and lemon herb crust

For the halibut, zest the lemon and mince the thyme and parsley - about 1 T of each. Mix with 1-2 tsp sea salt and lots of black pepper. The original recipe also calls for dill and chevril, but I was just using what I had in the fridge.

pressing herbs onto halibut

On the skinless side of the fillet, coat with the dijon mixture, then coat with the lemon zest / herbs, pressing to stick as much as possible to the dijon. Heat the oven to 450 degrees, and heat an oven-proof skillet over medium-high heat on the stove. Place the fish herb side down (in 1-2 T of olive oil), cook for 3 minutes, then flip so the skin side is down. Cook another 3 minutes, then place in the oven and roast until the fish is opaque and flakes easily. The roasting time will depend on how thick the fillet is - mine was about 1.5 inches, and it took 10 minutes of oven time before it was done. I like finishing this way because you get the crispy outside from searing, without worrying about burning the fish. Plus, when you remove it from the pan, the skin falls right off, staying behind in the hot pan.

arugula salad

Toss the dressing with fresh arugula, and serve the fish on top of the salad.

Thursday, May 22, 2008

homemade pasta with veal ragu

pasta with veal ragu

I've been traveling a lot for work lately (yes, I sandbag -- cook a lot on the weekend and then blog from lonely hotel rooms later in the week), so being back in the kitchen this past weekend was so great. It didn't matter to me that it's 85 degrees in Atlanta and that I shouldn't be thinking about heavy, hot dishes like homemade pasta and rich meat sauce, but I couldn't help it. The fact that I'm here, and my pasta machine is here, and we haven't seen each other in so long... Hence this meal. I can't fully explain how great homemade pasta is, but if I had to quantify it I'd say it's approximately 500 times better than the stuff from the box. In hindsight I guess I should have fed the pasta sheets through the attachment to cut them more evenly, but I loved the wide hand-cut noodles that I made myself.

Grocery list: a pound of meat (I used 1/2 pound ground veal and 1/2 pound local ground sirloin), 1 (28 ounce) can of peeled whole roma tomatoes, white wine, heavy cream, onion, garlic, rosemary or oregano, 2 eggs, A/P flour.

pasta sheets

I've covered the whole process of making dough - mixing 1 1/2 cups A/P flour with 2 eggs and a couple of T water in a food processor, then kneading and rolling sections through the pasta machine to make sheets - so I'll just pick up here with the sheets of pasta. I learned the hard way that once you cut the noodles, do not allow them to touch each other for even a minute, or they'll stick together and be impossible to cook. I researched this a little more and apparently the only thing I missed was dusting the cut noodles with flour. Live and learn...

simple meat sauce

To make a deceptively simple and rich meat sauce (good for wide noodles like this), start by sauteing an onion and a few cloves of garlic for a couple of minutes in olive oil. Add the meat and brown. Mix in a couple of T of tomato paste, and cook for 2-3 minutes. Stir in 1/2 cup of white wine, and cook until mostly reduced, about 5 minutes. Stir in 1/2 cup of cream, and cook down another 4-5 minutes. Add the tomatoes, crushing each whole tomato by hand over the pan (I didn't put the juice in the pan, other than what came from crushing the tomatoes). Season with salt, pepper, and whatever fresh herbs you want to add for flavor, then simmer over low heat for as long as you can stand to wait.

cooking pasta

Cook the fresh pasta in boiling salted water (I added a little olive oil too to prevent sticking) for 2-3 minutes; drain and serve immediately with the sauce and grated parmesan.

Tuesday, May 20, 2008

happy birthday cheesecake

cheesecake with strawberries

Yesterday was A's birthday, so I knew his "Mama Lynn" would be making him his favorite chocolate kahlua cheesecake to celebrate. Of course there's no way I wasn't going to make him a dessert myself, I just had to do something different (and a day early). I decided to make a standard cheesecake with lots of strawberries and sauce on top, as "refreshing" as a cheesecake can possibly be. I found an Emeril recipe that I took some pointers from as well -- like adding lemon and orange zest, and a splash of bourbon. Other than that, the ratios of sugar to cream cheese, how to make the crust, etc are based on the chocolate cheesecake. It was delicious - and poor A now has to choose between 2 types of birthday cheesecake every night this week.

Grocery list: 24 ounces cream cheese, 1 orange, 1 lemon, splash of bourbon or scotch, 1 package graham crackers, butter, sugar, 5 eggs, sour cream, vanilla.

graham cracker crust

Start with the crust - preheat the oven to 375 degrees, and crush 1 - 1.5 cups of graham crackers. Mix with 3 T of melted butter and 2 T of granulated sugar, and press into the bottom of a spring form pan. Place in the freezer for 5 minutes, then bake for 8 minutes. Lower the oven temp to 350 degrees.

cheesecake base

To make the filling, start with 3 packages of softened cream cheese (I use lower fat neufchatel). With a hand mixer, blend 1 cup of granulated sugar into the cream cheese. Add the zest of 1 lemon and 1 orange, plus 1 T of vanilla and blend until smooth. Next, add the eggs one at a time, blending after each addition. Finally, stir in 1 T of bourbon and 1/2 cup of sour cream.

baking cheesecake

Pour the filling into the prepared crust (depending on how much you trust your spring form pan to be nonstick, you may want to grease the sides of the pan with more butter). Place the pan inside a large roasting pan, and fill the roasting pan with water until it's about halfway up the sides of the cheesecake pan. Bake at 350 degrees for 1 hour and 20 minutes.

finished cheesecake

Carefully remove the cheesecake pan from the hot water, and allow to cool to room temperature for an hour or 2, then place in the refrigerator for several hours or overnight. I sliced fresh strawberries and poured 1/4 cup sugar over them, so that plenty of syrup was released. I also made some fresh whipped cream (3/4 c whipping cream + 4 T of powdered sugar, whipped with a hand mixer for 3-4 minutes).

Friday, May 16, 2008

chilled avocado and crab soup

100_2768

In the June issue of F&W, there's an article about "great ways to use guacamole". Normally if I make guacamole, there's never any leftovers that I need to worry about, but since I'm always looking for ways to eat more avocado, I really liked this recipe. Starting with a base of guacamole, you can puree it into this soup, which is actually both creamy and airy (yes, airy -- check out the bubbles in the picture) because of the addition of buttermilk.

Grocery list: 2 avocados, 1 lime, 1 clove garlic, 1 jalapeno, 2 scallions, cilantro, buttermilk, 1 bottle clam juice, and about 1/3 pound of jumbo lump crab meat.
100_2766

Start by making a basic guacamole. The recipe in F&W suggests roasting the scallions, jalapeno and garlic first, then mashing everything into the avocado. Since I was only making this for the soup, I went with as little effort as possible, mincing everything (note -- I only used about 1/3 of the jalapeno - a whole one per 2 avocados would be pretty spicy). I squeeze half the lime into the mixture along with a generous amount of sea salt, and some chopped cilantro.

avocado soup

Next, put the guacamole base (should be about 1 cup) into a blender with 1 cup cold buttermilk, 3/4 cup bottled clam juice (one bottle is 8 ounces usually), 1/2 cup ice water, and the rest of the lime juice. Puree until smooth, then season with salt and pepper. Pour the soup into bowls and top with jumbo lump crab meat. The recipe also calls for a creme fraiche and fried tortilla strip garnish, but the soup was rich enough that I left it out.

Thursday, May 15, 2008

grilled grouper with cheddar grits, tostadas and chipotle salsa

grilled grouper with tostadas and grits

Several weeks ago I went to Buckhead Diner for lunch, and had one of those entrees that you think about for days afterwards. It was such a unique combination of things - cheesy grits underneath a couple of crisp tostadas, with grilled mahi-mahi, all topped with a smoky chipotle sauce and fresh guacamole. I decided to try and recreate it on my own, and while definitely not exact (I admit, I used a jar of "homemade" salsa that I found in whole foods since I had no idea what to do with the original), it was delicious.

Grocery list: grits, chicken broth, garlic, cheddar cheese, blue corn tortillas, chipotle salsa, avocados, cilantro, tomato, lime, fillets of halibut, mahi-mahi or grouper.
prepping garlic cheese grits

Start by making the cheese grits. For "dinner" grits, I like to make them with chicken broth instead of water, and with the addition of garlic. I think this is especially necessary so the grits can balance out the strong flavor of the chipotle sauce. Bring 1 quart of chicken broth a 2 minced garlic cloves to a boil, then add 1 cup of old-fashioned (i.e. slow cooking) grits to the pot. Return to a boil, then reduce heat to medium-low and cook until the grits are done, usually about 20 minutes.
cheesy grits

Stir in a handful or 2 of shredded cheddar cheese, 2 T of butter, and a few T of whole milk or half and half. (This will help the grits to keep their creamy consistency while you prepare the rest of the meal.)

This is the point where I would make the guacamole as well -- by mashing 1 avocado with salt, juice of 1/2 a lime, some chopped cilantro, and half a chopped tomato (covered in a previous entry).

frying tostadas

Next, prep the tostadas. Heat 2 T of olive oil over med-high heat in a small fry pan. Place a shallow dish on the counter right next to the pan, and pour in about a cup of the chipotle salsa. Using tongs, place one corn tortilla carefully into the hot oil and fry for 20 seconds, flip, fry for another 20 seconds, then transfer into the dish of salsa. The idea is to crisp the tortilla, then cover with the sauce. Repeat until you have enough tostadas for 2 per plate (this recipe can easily feed 4, so make at least 8).

To grill a flaky white fish like grouper or halibut, you have a couple of options to prevent the fish from falling apart on the grill (this happens when the fish sticks directly to the grate, and when you try to flip it or remove it, it falls apart - very frustrating). You can either oil the grates of the outdoor grill AND the outside of the fish and then cook it directly on the grill, or you can wrap it in foil and cook it indirectly. I prefer the first option, because I like the charred marks on the fish and the flavor the direct flame imparts, but the second option is less risky. Either way, season the fish with salt and pepper, and grill for 4-5 minutes per side over medium-high heat, or until the fish flakes easily and is white throughout (no longer translucent in the middle).
tostadas over cheesy grits

To assemble the dish, spoon a layer of the cheese grits onto the plate, and follow with 2-3 tostadas. Top with a piece of grilled fish, then another spoonful or 2 of the salsa and a dollop of fresh guacamole.

Tuesday, May 13, 2008

orangette's gruyere souffle (AKA julia child's everyday souffle)

gruyere souffle

I recently purchased the May issue of Bon Appetit magazine to read on a flight. I was pleasantly surprised to see that they have a new featured column by Molly Wizenberg, who writes the wonderful Orangette blog. I love how she tells a story when describing an experience with a certain food, and then transitions into a specific recipe -- so captivating. Anyway, she presents her modified version of Julia Child's "everyday souffle" recipe, which of course I had to try myself. It wasn't quite as easy as Molly claims, but her reassurances made me want to try it in the first place, so I don't mind being oversold a tiny bit. As far as souffles go, it's as simple as they get -- just gruyere cheese mixed into the base.

Grocery list: whole milk, 4 egg yolks, 5 egg whites, grated parmesan, butter, AP flour, paprika, nutmeg, gruyere cheese.

prepping souffle base

Make the egg yolk base first. Start by heating 1 cup of whole milk in a small saucepan over low heat (just to get it warm and steaming -- not boiling). In a medium heavy saucepan, melt 2 1/2 tablespoons butter over medium heat. Add 3 T flour and whisk until it foams, about 3 minutes. Don't let it brown. Remove the pan from heat, and pour in the warm milk, whisking till it's smooth. Return to medium heat and continue to cook and whisk continuously for 2-3 minutes.
souffle base

Remove from heat and stir in 1/2 tsp paprika, 1/2 tsp salt, and a pinch of ground nutmeg. Add yolks one at a time, whisking in between to blend each one. Scrape all of the souffle base into a large bowl and allow to cool to lukewarm.
mixing whites and batter

Next, you beat the 5 egg whites in a large bowl with an electric mixer for a few minutes until stiff peaks form (you'll know when they are stiff peaks by shutting off the mixer and pulling the beater out of the whites, and if little sharp peaks form that don't fall over, the whites are perfect -- I found it took about 3 minutes). Fold one quarter of the whites into the base. Add 1 cup of coarsely grated gruyere, then fold in the rest of the whites in 2 separate batches.

prepping souffle dish

Preheat the oven to 400 degrees. Prep the pan by buttering a 6-cup souffle dish, then add 2 T grated parmesan cheese. Rotate the pan around so the parmesan clings to all the butter in the bottom and on the sides of the pan.
souffle batter

Pour the batter into the dish, place in the bottom third of the oven, and immediately turn the oven down to 375 degrees. Bake for 25 minutes, till the top is golden brown and the souffle has risen and only the center moves slightly when the dish is shaken. **Do not open the oven door or disturb the souffle at all in the first 20 minutes. For the explanation of why this is important, you'll have to read Molly's interesting article...

Monday, May 12, 2008

chef sev cracks the benihana code: yum yum sauce

hibachi grill with yum yum sauce

I have always loved a good "Japanese steakhouse" -- in college my friend Morgan and I would save up for special occasions to go over to the hibachi grill for the early bird special (2 for $19.95!). While I love the highly trained grill masters who can create little bunny rabbits out of shrimp tails and flaming volcanoes out of stacked vidalia onions, my favorite thing has always been the mysterious "yum yum sauce"-- the white sauce that they provide on the side for dipping your shrimp and vegetables into (or for smothering your entire plate indiscriminately). I have tried and failed to figure out the secret to this sauce for years, but there isn't a Benihana in the world that will give up the ingredient list. That is, until A's dad, AKA "Chef Sev", decided to crack the code. He has succeeded - don't ask, because he won't reveal his sources - and the result was the absolute perfect replica of benihana's world-famous yum yum sauce. We grilled up shrimp, chicken, steak and tons of mixed vegetables last night, and drowned it all in this amazing sauce. Grab this recipe while you can, before the Benihana trademark police force me to take it down...

Grocery list: 1 cup hellmann's mayo (regular, not light), 1/2 teaspoon each: sugar, paprika, ketchup, ground ginger, hot sauce, dry mustard powder, white pepper; 1/2 Tablespoon garlic juice (found in the asian food section of any grocery store, OR you can substitute garlic powder if you can't find the juice), 1/8 tsp salt, 2 T melted butter, 3 tsp rice vinegar, 1/4 cup water.

yum yum ingredients

This picture looks pretty disgusting, but these are all the ingredients.

yum yum sauce

Whisk together and refrigerate for at least several hours or overnight, to allow the flavors to blend. Bring to room temperature before serving. Thanks Chef Sev!

Sunday, May 11, 2008

old school apple pie

apple pie

When I was growing up, one of my favorite things *ever* was spending time with my grandparents, who live on the Pee Dee River in rural North Carolina. They grew (and still do, although less volume) every fresh vegetable imaginable, and had all kinds of fruit trees right by the house - figs, peaches, pears, apples, etc. My Gramma and I would bake all kinds of cobblers and pies, which, looking back on it, probably planted the seed for my love of cooking. These days it's fun to impress A and his family (all from Pittsburgh) with recipes that aren't so common outside of the southeast -- recipes taught to me by my Gramma. One of A's favorites is this apple pie.

Grocery list: shortening, flour, salt, sugar, brown sugar, cinnamon, butter, golden delicious apples (6 cups sliced -- about 5-7 apples depending on size).

100_2758

The most authentic southern pie crust is simple, although it pains me every time I have to purchase shortening (crisco - yes, really). Cut up 3/4 cup of shortening into little pieces in a bowl, then add 2 cups of flour and 1 tsp salt.

100_2759

Mix with a fork until the consistency is that of little clumps of dough. Add 1 T of ice water at a time, working with your hands, until you can form the dough into a ball (usually about 3-4 T of water). Knead until smooth, then split into 2 discs, cover with plastic wrap, and refrigerate.

100_2761

Next, preheat the oven to 375 degrees and make the filling. Peel and slice the apples to make 6 cups. Add 3/4 c brown sugar, 3/4 cup granulated sugar, and 3/4 cup flour, plus 1-2 T of cinnamon. Pour 2 T of melted butter over the mixture. Work the apple slices with your hands until they are coated with the filling.

100_2762

To finish the crust, roll out the ball of dough on a floured surface until it's 2 inches wider than your pie pan on all sides. Place the dough into the pie pan and add the filling.

100_2764

Roll out the top crust till it matches the shape/size of the pan, then transfer carefully to cover the pie. Work the bottom and top edges together, pressing around the perimeter of the pan.

100_2765

Cut slits into the top so steam can escape; pat a few teaspoons of butter on the top and sprinkle with sugar. Bake covered with foil for 25 minutes, remove the foil and bake for another 20-25 minutes until golden brown.

100_2772

Serve warm with vanilla bean ice cream.