My blog has moved!

You should be automatically redirected in 6 seconds. If not, visit
http://ahungrybear.com
and update your bookmarks.

Showing posts with label main. Show all posts

Sunday, January 18, 2009

bacon wrapped maple pork loin

bacon wrapped maple pork loin

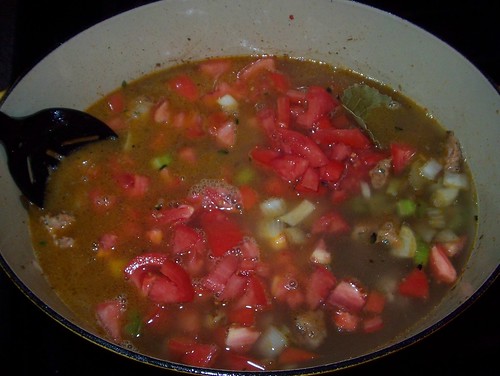
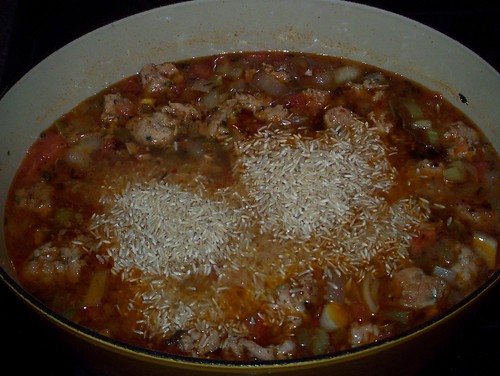
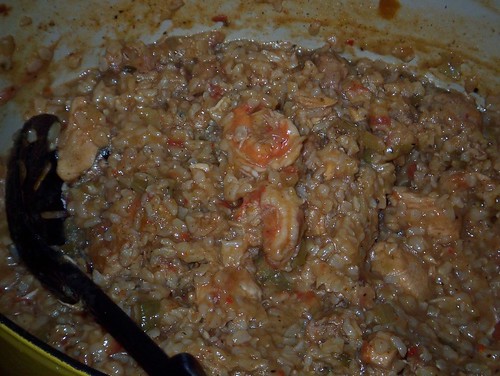
First, an apology/excuse... I've been (and still am) traveling to Colombo, Sri Lanka, for a work trip. As with all other work trips, I cooked up a storm before leaving (both so A would not starve in my absence, and also so I'd have some photos and recipes to blog about when I'm up at 4am with jet lag and nothing to occupy my time but the indiscernible plotlines of Bollywood movies). But this trip, I've just been so busy, and more homesick than usual, so I've been avoiding the pictures of familiar comforting foods. Without further procrastination, here is an amazing recipe I found on Epicurious for a roasted pork loin. It is certainly not meant to be cooked, portioned and then frozen, but I'm happy to report that this is what I had to do out of necessity, and A has informed me it worked perfectly well. Note that you'll need between 8 and 24 hours to brine the pork before roasting it.

Grocery list: (for the brine) 1/3 cup kosher salt, 2 T maple syrup, black peppercorns, 2 sprigs fresh sage, garlic, 1 bay leaf, 3-4 pound boneless pork loin roast; (for the roast) 3 garlic cloves, 2 T finely chopped fresh sage, 3 T maple syrup, bacon slices, 1 T cider vinegar.

brine for maple pork

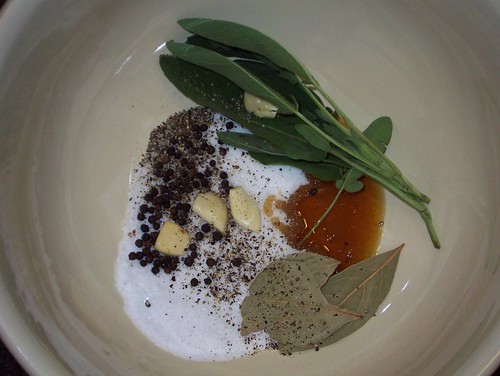
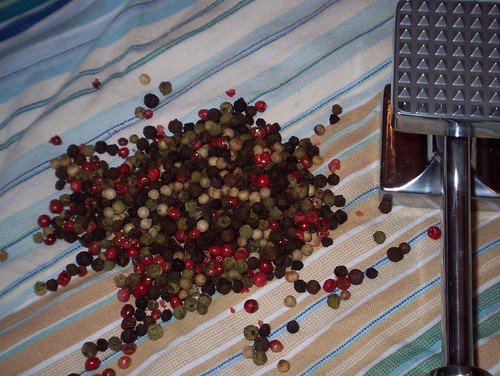
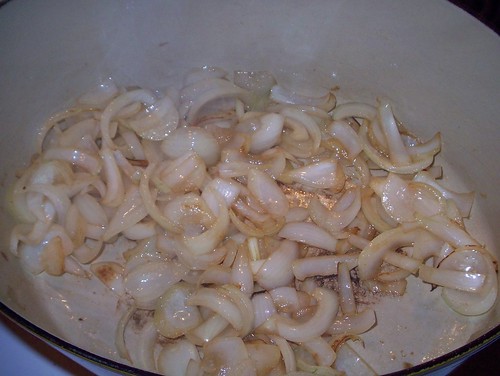
To make the brine, combine the salt with 8 cups of water, a smashed garlic clove, a couple sprigs fresh sage, a bay leaf, 1 T of syrup, and a large pinch of black peppercorns. The original says to heat this all in a saucepan over the stove, but to save some of the dishwashing, I placed this in the bowl I normally use to brine things (meaning, a big one), and heated it in the microwave for 3 minutes. Allow to cool to room temperature, then chill in the fridge for an hour.

pork loin in brine

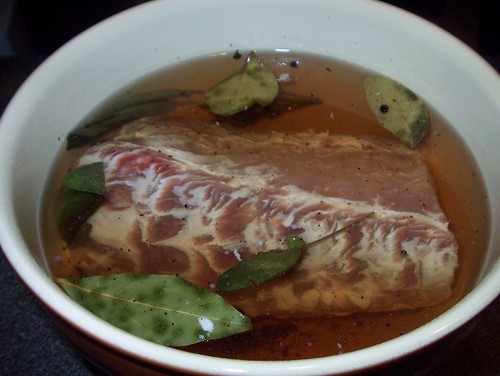
Submerge the pork loin in the bowl, and chill for at least 8 hours and up to 24.

maple sage garlic paste for pork roast

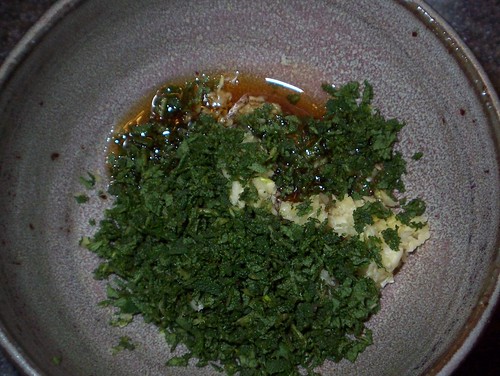
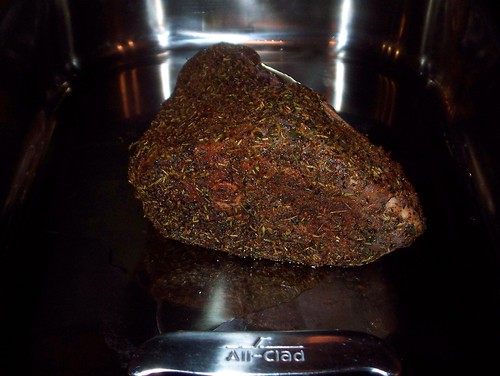
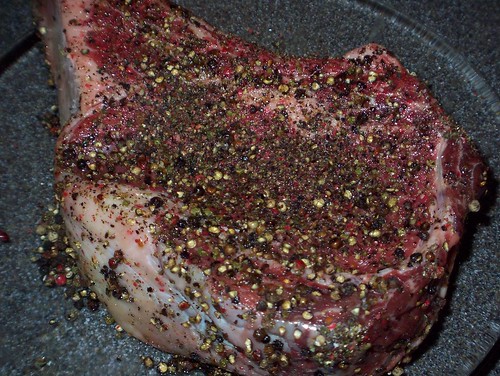
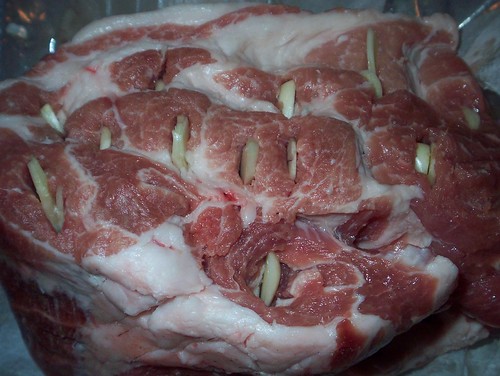
When it's time to roast the pork, remove it from the brine and pat it dry. Make a paste of 3 minced garlic cloves, the sage, and 1 T of the syrup.

pork loin with sage maple paste

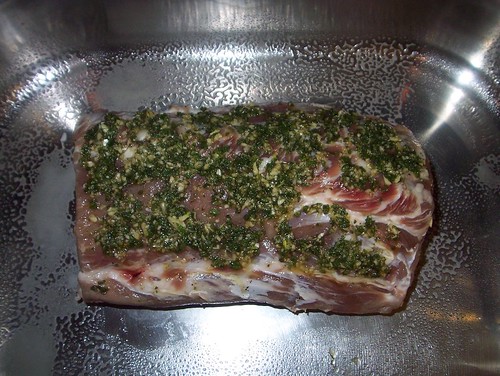
Rub this over the top and sides of the pork.

bacon wrapped around pork loin

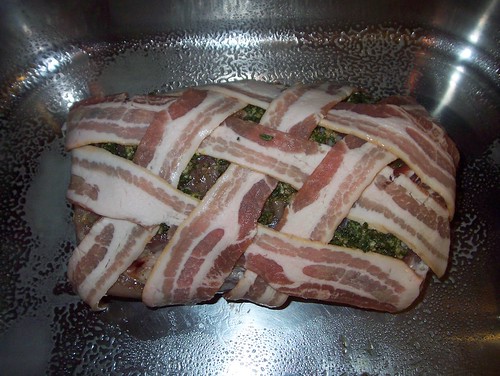
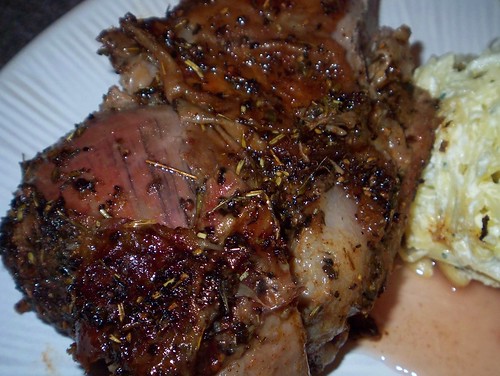
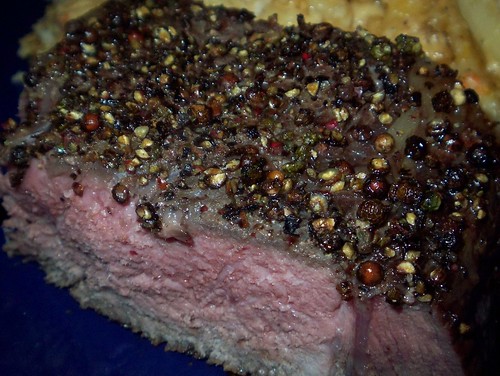
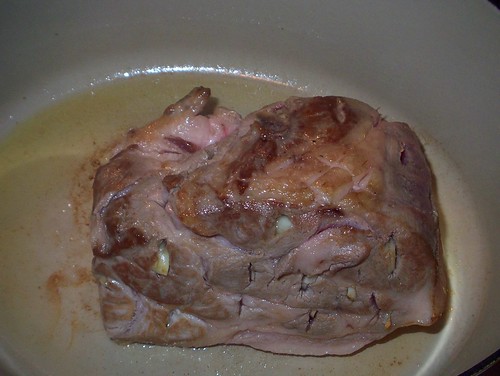
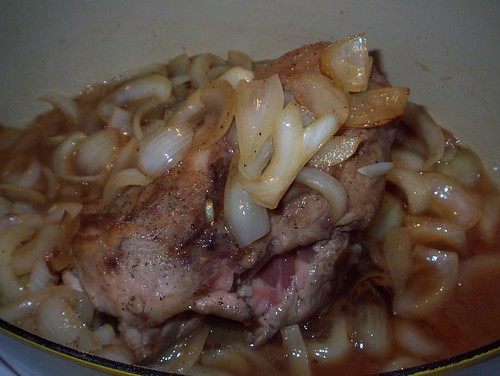
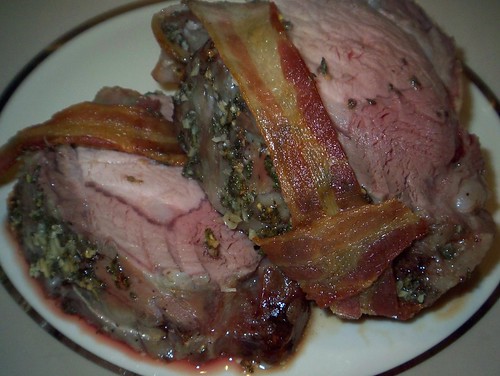
Lay strips of bacon across the pork to cover the top - the original calls for 16 slices but I only needed to use 6. Tuck the ends of the bacon underneath the pork. Roast at 350 degrees on the center rack of the oven until the pork is 140 degrees (this took a little over an hour).

maple cider vinegar glaze

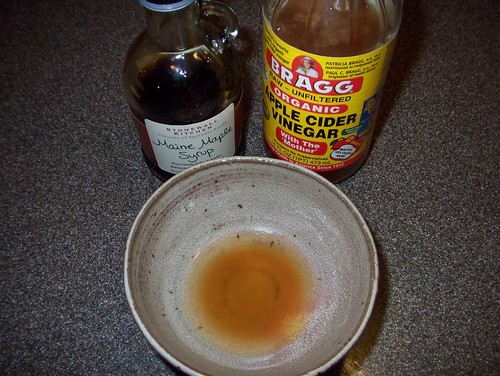
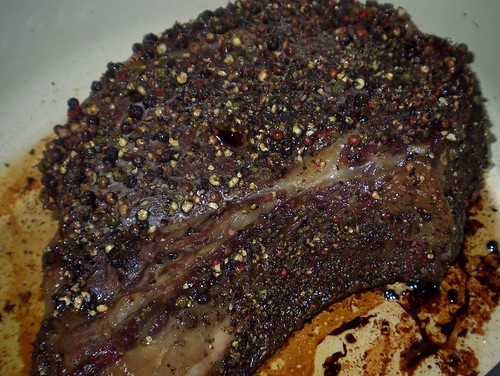
Make the glaze by mixing the remaining syrup with the cider vinegar, then brush this over the pork. Return to the oven and continue to roast until the internal temperature of the pork is 150 degrees (this was about 15 more minutes for me).

bacon wrapped pork loin 2

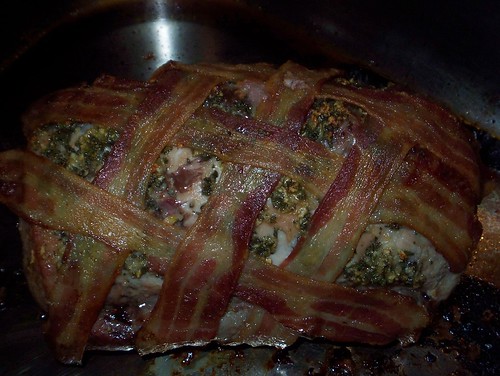
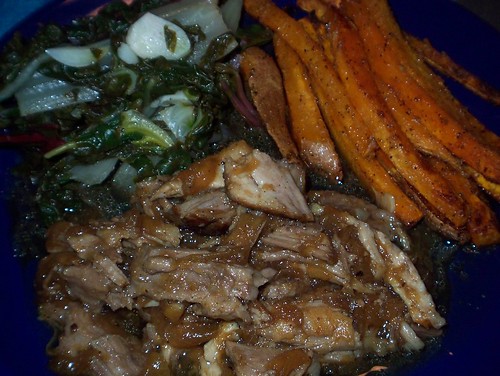
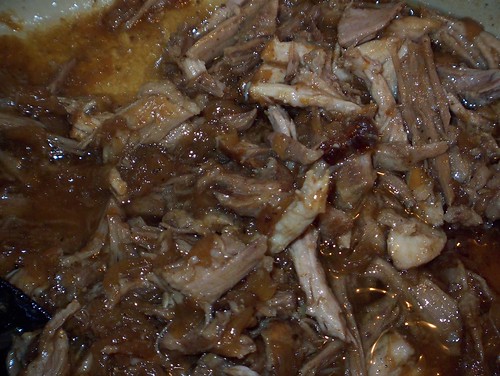
When the roast is done, remove from the oven but leave it resting in the pan for about 15 minutes. This will allow the pork to reabsorb some of its juices. The original recipe provides instruction for cooking up a simple au jus from the pan juices mixed with more syrup and cornstarch, but I decided to skip this. If you end up trying it, let me know how it turns out. Slice the roast on the diagonal to serve.

Friday, October 24, 2008

herb-crusted roast leg of lamb

herb roasted lamb leg

Lamb is one of those less expensive cuts of meat I'm trying to use more often, and especially since you can throw a roast in the oven and dinner is ready a couple hours later. This one was so easy, and I suppose it's a technique you could use for almost any roast cut.

Grocery list: 2-4+ pound leg of lamb (or other roast cut), 1 lemon, 1 large gallon-size ziploc bag, olive oil, and herbs (mix of dried or fresh - rosemary, thyme, oregano, mint - really, whatever you have, just a lot of it).

herb crust for lamb leg

Trim any excess fat or silver-skin from the lamb leg, then drop it in the ziploc bag. Add a good drizzling of olive oil, then throw in excess amounts of herbs - you're trying to cover the entire surface of the roast. Salt and pepper it generously, then cut your lemon in half, squeeze the juice into the bag (you can throw the lemon halves in the bag for good measure). Let it marinate for at least a couple hours, or set it up at night for roasting the next day. It can sit in the bag for 1-2 days.

Roast at 350 degrees for 1.5-2 hours, or until the internal temperature measures 150 degrees for medium. Remove from the oven and tent with foil; the temperature will continue to rise to about 160 (now it'll be medium to medium well). Adjust if you prefer more or less done - just remember that the roast continues to "cook up" another 10 degrees when you remove it from the oven! Carve and serve - I made this with the spaghetti squash & ricotta dish.

Monday, October 13, 2008

cheesy baked penne with cauliflower and creme fraiche

cheesy baked penne with cauliflower and creme fraiche

The full page photo of this dish in October's Bon Appetit sucked me in - I'm always a sucker for a new mac-and-cheese recipe. This proved to be the most complicated m&c dish I've ever attempted, but also the richest and most flavorful. The different cheeses are all pricey though, so it won't be something I make all the time. (Yes, I do realize how contradictory this is with my last post about choosing cheaper cuts of meat. There's a reason I don't work in finance...)

Grocery list: 1 head of cauliflower, 2 large heirloom tomatoes, 5 T butter, 1 bunch green onions, 2 T AP flour, 1c heavy cream, 3 c grated Comte cheese (half Fontina & half Gruyere is listed as the substitute if you can't find Comte - approx 9oz), 3/4 c grated Parmesan, 1 c creme fraiche, 1T whole grain Dijon mustard, 3.5 (10oz) penne, 1 cup breadcrumbs (I substituted panko).

blanched cauliflower

Bring a large stockpot of salted water to boil. Wash and chop the cauliflower into 1 inch florets, then cook in boiling water for 5 minutes. Remove from water with slotted spoon, then drop in both whole tomatoes and boil for 1 minute.

blanching heirloom tomatoes

Carefully remove them from the water and turn off the heat. Set the hot water aside though, so you can reuse it for cooking the pasta.

ingredients for creme fraiche penne

Blanching the tomatoes will help you peel them, as the skin should almost fall off. Chop the tomatoes. At this point you should grate the Comte, chop the green onions, and get everything set up for making the cheese sauce.

sauteing cauliflower tomatoes and green onions

Melt 2T of butter in a large skillet over med-high heat, then cook the cauliflower for 5 minutes. Add chopped tomatoes and the chopped green onions and cook for another minute.

cauliflower green onion and tomato filling for penne

Season with salt and pepper and remove from heat.

flour and butter for creme fraiche sauce

Melt 2T of butter in a saucepan over med-low heat, then add flour and stir for 2 minutes. Whisk in the cream slowly.

heavy cream and butter sauce

Now, this was different than most white sauces, since the cream has such a higher fat content. I kept whisking it, but the fat started separating out and I thought the whole thing was ruined. But I turned down the heat and kept whisking and it reconstituted once I added the cheese in, but wanted to point this out in case the same thing happens.

comte dijon creme fraiche sauce

Add 2 cups of the grated Comte, and whisk until melted. Stir in 1/2 cup grated Parmesan, then the creme fraiche and 1 T Dijon. Season with salt and pepper and set aside. Bring the large pot of water back to a boil and cook the penne for 10 minutes. Drain and immediately return to the pot. Stir in the cheese sauce and the cauliflower mixture.

layering cheesy cauliflower penne with comte

Spoon half the pasta mixture into a baking dish, then sprinkle 1/2 cup Comte. Layer the rest of the pasta and the Comte on top.

cheesy penne ready to bake

The recipe calls for melting 1 T of butter and toasting the breadcrumbs at this point, but I skipped this step. I mixed the rest (1/4 cup) of the Parmesan with a cup of panko and spread across the top of the casserole.

cheesy penne with cauliflower

Bake at 350 degrees for 35 minutes, until bubbling and golden on top.

Friday, October 10, 2008

salt and pepper crusted rib roast

pepper crusted rib roast

With the economic downturn, a lot of little luxuries are being cut, and those businesses trading in little luxuries are figuring out how to adapt. WF has done a great job of this, with all the "real value" campaigns, new $15 family dinners, etc. I also really enjoyed Gourmet's October issue, where they featured different cuts of meat (and what they can replace, how to cook them, and a few great recipes). My favorite was this Salt & Pepper crusted rib roast. I only had one little rib (still, 2 pounds!) instead of the gorgeous 10-pounder in the cover photo, so obviously a meat thermometer is important. This isn't exactly pinching pennies, but a nice splurge without blowing your weekly grocery budget.

Grocery list: beef rib roast, peppercorns, salt, olive oil.

crushing peppercorns 2
Place a handful of peppercorns on a kitchen towel (not a microfiber or terry one, or the pepper will stick to it!), fold over the edges, and pound with a meat pounder.

crusting rib roast with pepper

Brush the roast with oil and press coarse salt and the crushed peppercorns on all sides.

pepper crusted rib roast 2

Roast at 450 degrees for 20 minutes, then at 350 degrees until internal temperature registers 110 degrees. Remove from oven and allow to rest for 30 minutes, in the same pan, with a lid or foil tent over top. (Temperature will continue to rise until it reaches 130 degrees for medium rare. I left the roast in the oven until the temperature was 120, because I wanted it medium - just keep in mind that it will continue to cook after it leaves the oven).

Wednesday, October 1, 2008

apple cider-braised pork shoulder

cider pork shoulder chard sweet potato fries

Like most people, the recession is having an impact on the food I eat. But instead of giving up on the "slow movement" entirely, I'm really trying to learn to cook cheaper cuts of meat in creative ways. Some of these experiments have been failures - I don't have the heart to post the cranberry mushroom brisket that seemed so promising but was tough and boring - but this pork shoulder was a decisive win. I think most of the time people use shoulder for pork barbeque, but I didn't have the time to babysit the grill for 4 hours. This recipe (from Epicurious) was great, since you only have about 10 minutes of prep time, then the roast cooks slowly in the oven. The meat was really tender, and until I make the mistake of looking up nutrition facts for pork shoulder, this is going in the rotation.

Grocery list: 3-4 pound pork shoulder, 2 garlic cloves, 3/4 cup apple cider, 5 large onions, olive oil.

slits for garlic in pork shoulder

Thinly slice the garlic, then cut slits into the pork shoulder. Insert the pieces of garlic in the slits. Season all over with salt and pepper.

browning pork shoulder

Heat 1 T olive oil in a large dutch oven, then brown the pork for about 1 minute per side. Remove the pork shoulder to a plate.

browning onions for pork shoulder

Heat another T olive oil in the pan, then saute the onions (sliced lengthwise) for 10 minutes, or until they start to caramelize. Stir in the apple cider.

roasting pork shoulder

Place the pork back in the pan, cover tightly with foil (or the dutch oven lid, if you have the oven-safe handle), and roast for 325 degrees. The recipe calls for 2.5-3 hours, but use a meat thermometer to be safe.

apple cider roast pork shoulder

Remove the roast, and if the onion mixture is still more liquid-y than syrup-y, heat over medium-high flame until reduced. Shred the pork and serve with the sauce. I also made sweet potato fries and garlic chard - they tasted great but the pork's sauce can make the fries soggy. Fair warning...

Tuesday, September 30, 2008

chicken pot pie

chicken pot pie 2

It would be really unfair to judge this chicken pot pie by the photos. Here's what happened: I saw some great pictures of a chicken pot pie in Bon Appetit, then did some research in my New Best Recipe book. I made a sort of hybrid of both recipes, a full batch - but split it into 2 smaller baking dishes, and froze one of them. All the photos were from prepping them in the original batch, but then the first one was so delicious and I was so starving that I just forgot completely to take a final picture. So a couple weeks later, I bake the second one (great to have a backup for the photo-op, so I thought), and while it was just as delicious, something weird happened with the inside bubbling up over the crust, so it was ugly as sin. Anyway, that's why you shouldn't judge. Try this, okay? It's amazing.

Grocery list: (topping) 1.5 cups AP flour, 4 T shortening, 8 T butter, 3-4 T ice water; (filling) 1.5 pounds chicken, 1.5 c chicken broth, 1 onion, 3 carrots, 1 celery ribs, 4 T butter, 1/2 flour, 1.5 c milk, thyme, 1 cup chopped mushrooms, 1/2 cup heavy cream, 1/2 cup white wine, 3/4 frozen peas (thawed), fresh parsley.

step 1 pot pie crust shortening and flour

Start by making the crust in a food processor. Note - the butter and shortening should be really cold, cut into 1/4 inch pieces, before putting into the processor. Mix the flour and a pinch of salt in the processor, then cut the shortening in with short pulses. Then add the butter and keep pulsing until it has a cornmeal consistency, and dump everything into a bowl.

crust for pot pie ready to knead

Mash 3 T of ice water into the crust with a spatula (add another T if it doesn't stick together).

crust for chicken pot pie

For a ball and flatten into a disk; wrap with plastic wrap and refrigerate for 30 minutes. Roll it out on a floured surface until it's a little bigger than the size of your baking dish.

prepped ingredients for pot pie

You can make your own chicken broth by poaching the chicken in water over a slow boil (throw in salt, peppercorns, garlic cloves, some thyme, some extra chunks of celery or carrot if you have them) for about 20 minutes. Set aside 1.5 cups of the broth and shred the chicken. Prep all the vegetables by chopping into small 1/4 inch pieces.

carrot onion mushroom celery for pot pie

In a large dutch oven, saute the carrots, onions and celery (I added mushrooms too) in olive oil over medium-high heat for about 5 minutes.

sauteing vegetables for pot pie

Add a few sprigs of chopped thyme. Then, stir in the white wine, and season well with salt and pepper.

vegetables with broth for chicken pot pie

Stir in the chicken broth, and bring to a boil. It should reduce down by about half within 5 minutes.

melted butter and flour for thickening pot pie

Melt the butter in a small bowl in the microwave, then stir in 1/2 cup flour to make a paste. This will help thicken the filling.

chicken pot pie filling

Stir in the heavy cream and bring back to a simmer, then stir in the chicken pieces. Mix in the flour/butter mixture one spoonful at a time, stirring well, so the filling thickens.

chicken pot pie baked

Pour the filling into 1 or 2 baking dishes, then cut your crust to cover it. Poke a few holes through the top to allow the steam to escape. Bake for 30 minutes at 400 degrees, until the top is golden and the filling is bubbling (or in my case, till the filling bubbles all the way over and looks terrible but still tastes delicious).

Monday, August 18, 2008

classic jambalaya

jambalaya shrimp 2

None of these photos do justice to this classic jambalaya dish, but I'm going to blog it anyway in the hopes that AHB readers trust my recipes more than my photography skills by now... I've made crab and andouille sausage jambalaya before, but A made a special request a while ago for a "real" jambalaya (i.e. with shrimp, not crab).  There are a surprising number of versions of this dish, but if I was going to trust anyone specifically, it would have to be Emeril, since creole cooking is his bread-and-butter. He didn't let me down - although his recipe made such huge portions (even by A's standards), we were eating leftovers for so long that I probably won't get this request again for months.

Grocery list: 1 pound medium shrimp (peeled, deveined), 2 pounds chicken, 1.5 pounds andouille sausage, 3-4 garlic cloves, 2 onions, 2-3 stalks celery, 1 bell pepper, 3-4 dried bay leaves, cayenne pepper, 2 sprigs fresh thyme, 1-2 tomatoes, 2 cups rice, 1 bunch green onions, handful of fresh parsley, plus Emeril's Creole seasoning (his proprietary blend of paprika, salt, garlic powder, black pepper, onion powder, cayenne, dried oregano, dried thyme).

seasoning shrimp for jambalaya

Start by chopping the onions, celery, tomatoes and green onions. Cut the chicken and sausage into bit-size pieces. In separate bowls, season the shrimp and chicken pieces generously with the creole seasoning (enough to coat - the more you season it, the spicier the jambalaya will be).

shrimp for jambalaya

Heat a couple T of olive oil in a large dutch oven - medium high heat - and saute the shrimp. After 3-4 minutes, the shrimp will be almost cooked through (whitish pink instead of opaque), so remove from the pot and set aside. They'll cook the rest of the way through when you add them back to the cooking jambalaya later.

chicken for jambalaya

Add a couple more tablespoons of olive oil to the pot, and cook the seasoned chicken pieces about 6-8 minutes. Remove and set aside as well.

add vegetables to sausage jambalaya

Add the sausage pieces to the pot and brown evenly, then add all the vegetables *except for the green onions* (you'll add those later). Throw in a couple of minced garlic cloves, a few bay leaves, a sprinkle of extra cayenne, and a couple sprigs of fresh thyme.

add tomatoes to jambalaya

The vegetables will wilt after 5-6 minutes, at which point you can add your chopped tomatoes. Stir in 6 cups of water plus the cooked chicken pieces.

add rice to jambalaya

You may want to check your rice label before using this ratio - I used brown rice, which requires a little less water but much longer cooking time. Emeril's recipe calls for 2 cups of rice to 6 cups of water - I used 2 cups brown rice and reduced that water (and the cooking times - I made sure to NOT add the shrimp until the rice was about 10 minutes from being done). Bring the pot to a boil, reduce heat to low, and cover. Cook for 15 minutes, or as long as your rice needs to cook minus 10 minutes.

jambalaya shrimp sausage

Stir in the shrimp, the chopped green onions, and a handful of chopped parsley, and cook for another 10 minutes. The rice should be done, and the liquid almost entirely cooked out - the consistency is creamy, not watery. Turn off the heat and allow to stand for at least 10 minutes.